
In the 1st lecture, I covered how to get root window ready using tkinter GUI toolkit.
In this lecture we will be covering how to design basic interface using tkinter widgets. In this post our objective is to focus on THREE Objectives:
- What?
- Where?
- How?

•What components should appear on screen?
This involves choosing the components that make the user interface. Typical components include things such as buttons, entry fields, checkboxes, radio buttons, scroll bars, and the like. In Tkinter, the components that you add to your GUI are called widgets.

Where should the components go?:
This involves deciding the positioning or placement of each component in the overall design structure. This includes decisions to be made on issues of positioning and the structural layout of various components. In Tkinter, this is referred to as geometry management.

How do components interact and behave?:
This involves adding functionality to each component. Each component or widget does some work. For example, a button, when clicked on, does something in response; a scrollbar handles scrolling; and checkboxes and radio buttons enable the user to make some choices. In Tkinter,the functionality of various widgets is managed by command binding or event binding using callback functions.
Core Tkinter Widgets
widgets are the components appear on screen, such as Button, Text, Menu etc. General Syntax of any widget is:
mywidget = Widget-name (its container window,**configuration options)
Lets make a test GUI App using basic widgets
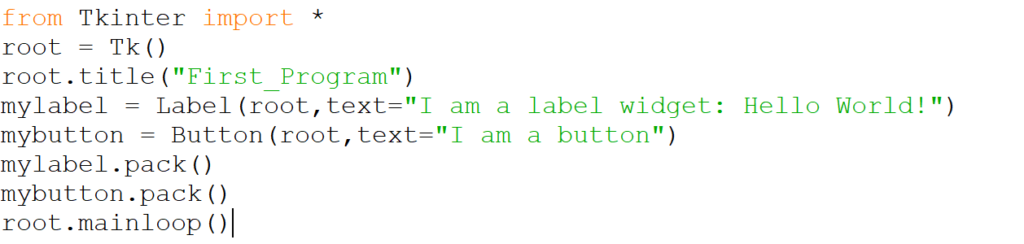
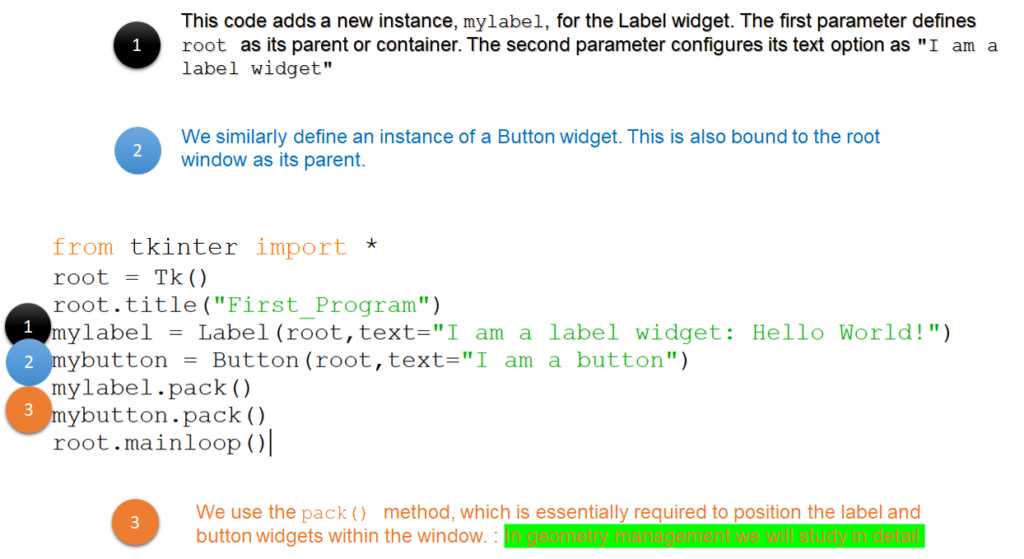
To understand first two lines of code please refer Tkinter Part 1 of this series. In the line 3rd title is assigned to a root object. Then 4th and 5th lines include label and button, whereas 6th and 7th line of code uses a pack function, which decides where to place a widget, here we haven’t passed any arguments inside pack function, so it will work in a default fashion.
Here is the list of other widgets which we can use to develop a GUI tool:

Geometry Management
Geometry management decides where to place a widget, it has following functions:
- pack(): This is the one we have used so far. Simple to use for simpler layouts but may get very complex for slightly complex layouts.
- grid(): This is the most commonly used geometry manager that provides a table-like layout of management features for easy layout management.
- place(): This is least popular but provides the best control for absolute positioning of widgets.
Here are some configuration options of pack are:
- side:
- LEFT, TOP, RIGHT, and BOTTOM (these decide the alignment of the widget)
- fill:
- X, Y, BOTH, and NONE (these decide whether the widget can grow in size)
- expand :
- 1/0 or Yes/No (corresponding to values respectively)
- anchor:
- NW, N, NE, E, SE, S, SW, W, and CENTER (corresponding to the cardinal directions)
- Internal padding (ipadx and ipady) and external padding (padx and pady)
- which all defaulted to a value of zero
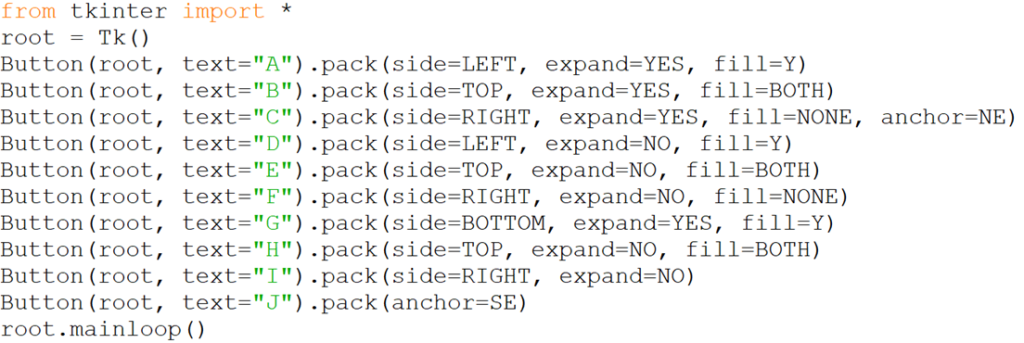
Lets write a program to understand how these configuration options can be used with pack():
Please run the above program and tell me did you like learning tkinter? Do you find my blogs interesting..?
